


BOM (Bill of Materials)
The Bill of Materials (BOM) is the list of the parts, raw materials or components that are required to build an end product. I.e., It is the combination of some input items an output item will be created. For example:
A SKU with Tea is created and the items which are used to prepared a tea are linked to that Tea SKU such as Tea powder, sugar, milk.
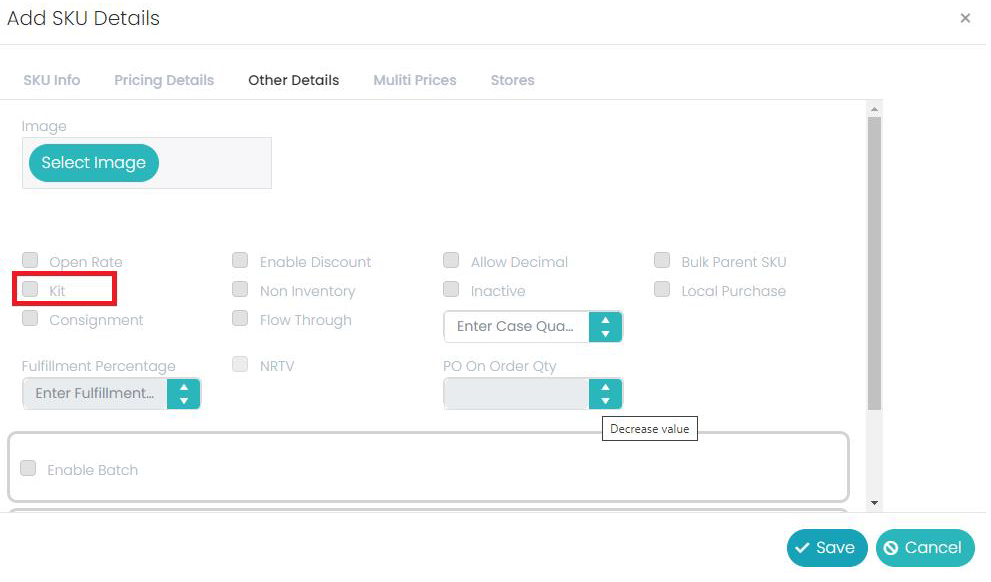
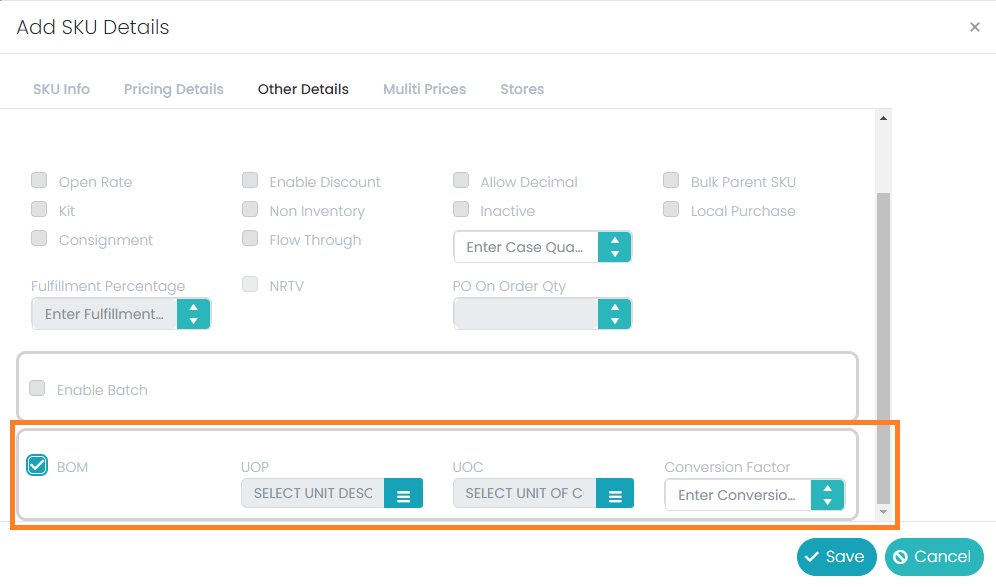
In SKU Master under ‘Other Details’ there is an option called “BOM” along with one check box for it. If the user enables that checkbox the UOP (Unit of Purchase), UOC (Unit of Consumption) and Conversion Factor fields must display on the screen.
BOM Process
At Menu bar under ‘Masters’ heading there should be an option with name ‘BOM’ to create the bill of material items.
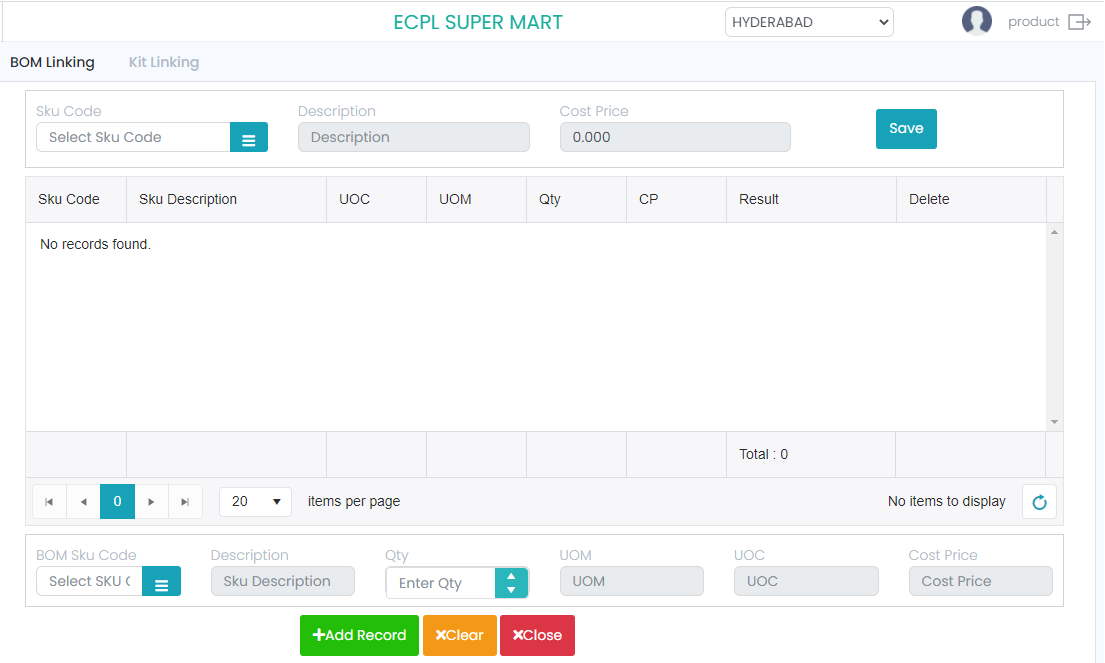
In the BOM screen below fields will be there along with a grid to show the data.
SKU Code, SKU Desc, Last CP, BOM SKU Code, Description, Qty, UOM, UOC, Cost price.
SKU Code:
The ‘SKU Code’ field is an entry field, along with a ‘Browse’ button If the user clicks on the browse button it should show a window which should show the list of all available ‘SKU Codes’ and their descriptions along with one search option to search the Output SKU. It’s a mandatory field in this process.
SKU Desc:
SKU Desc is the name of the selected SKU, which should come automatically after selecting the ‘SKU Code’. It should not be editable here; it should be in display mode only.
Last CP:
Last CP field will be updated with the consolidated CP value of all ‘BOM Items’ which are involved for the respective ‘SKU’ which should come automatically based on the ‘BOM SKU’ CP values. It should be display mode only.
Grid:
The Grid will have columns of ‘BOM Sku Code’, ‘BOM Name’, ‘Qty’, ‘UOC’, ‘UOM’, ‘CP’, ‘Amount’ and ‘Delete’. Here the record will be inserted after entering the ‘Input SKU’, its respective quantity and clicking on the ‘Tab’ button. This flow of entering the details is mandatory, otherwise the data will not be pushed to grid.
BOM Sku code:
Here the ‘BOM Code’ is the SKU Code which will be used in the making of a unit of ‘SKU’, which should come in the ‘BOM Code’. It should not be editable here.
Description:
In the ‘BOM Name’ column of the grid the respective ‘BOM SKU’s Name’ should come automatically along with the ‘BOM code’. It should not be editable here.
Qty:
In the ‘Qty’ column of the grid, the entered quantity of the respective ‘BOM SKU’ should come along with the ‘BOM SKU Code’. It should be editable here, so based on this the ‘Amount’ value in the grid should change accordingly.
UOC:
In the ‘UOC’ column of the grid, the respective ‘BOM SKUs’ ‘Unit of Consumption’ should come along with the ‘BOM SKU Code’. It should take the UOC value from the SKU Master -> BOM. It should not be editable here.
UOM:
In the ‘UOM’ column of the grid, it should come the ‘Unit of Measurement’ of the respective ‘BOM SKU’ from the SKU Master. It should not be editable here.
Here the SKU Code is the resulted product of contribution of multiple ‘BOMs’ with respective quantity. This SKU will be used at the ‘Billing Process’ only but not at Purchase Order, GRN, PRN, TO, TI and Stock Write Off. This ‘SKU’ should be created at SKU Master as ‘Non-Inventory Item’. Output SKU will not have any separate stock, but it will be depended on the involvement of the ‘BOMs’ and their respective input quantity per unit of ‘SKU’.
KIT
The Kit is the combination of three to four products.
For Example: Chips, KitKat, Britannia all the 3 products are combined together to sale this is known as Kit.
In SKU Master under ‘Other Details’ there is an option called “KIT” along with one check box for it. If the user enables that checkbox, then it’s a parent sku that all the child SKUs should be linked to this parent SKU.
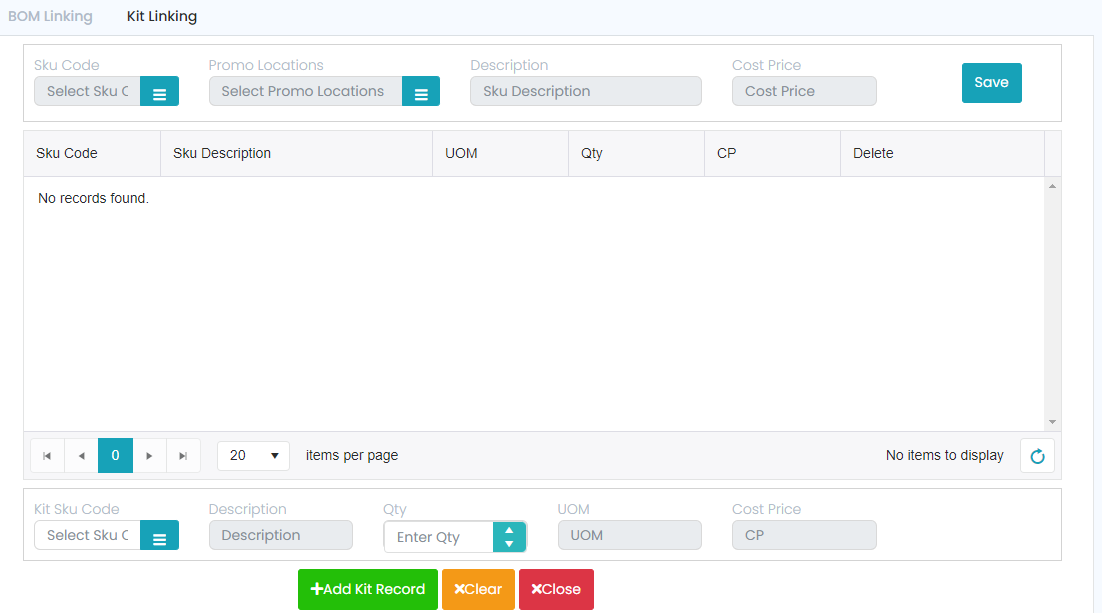
In masters there is a module names as KIT, if the user clicks on that it leads to another screen with the fields: SKU Code, Promo Location, Description, Cost Price, Kit Sku Code, Description, QTY, UOM, Cost Price.
Sku Code means that the parent Sku for which the KIT checkbox is enabled that should be entered.
Promo location means the user should select the name of the location for which the promo needs to be applied.
As per the selected sku code the description and the Cost Price will reflect in their fields.
In the bottom we have, Kit Sku code means the user should enter the child sku’ to which the parent must link. As per the entered sku the description, UOM and the CP will reflect.
The user should enter the QTY manually on his/her basis of linking.
Hence in this module the child sku will be get linked to the parent sku.
Billing: The billing will be happened to both the parent and child sku.
If the billing is happened to parent means to which the Kit checkbox is enabled, then the QOH will deduct from the child sku based on the linking given at the time of kit linking.