


Hierarchy Group Master
This module is used for to create the Department, Category, Subcategory, Brand, Attribute all in the one module at a time.
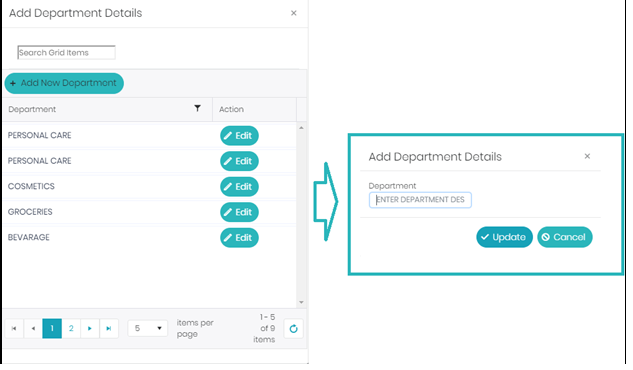
To create a new Hierarchy or want to edit existing details of hierarchy, go to Masters, select Hierarchy Master.
In Hierarchy master we have another Group “NON-LINKED HIERARCHY GROUP”, in this we can see non linked hierarchy to the SKU which we have created for hierarchy master rather than SKU master.
To edit the existing hierarchy details, click on the edit button, change the details, and click on Update button to save the changed details.
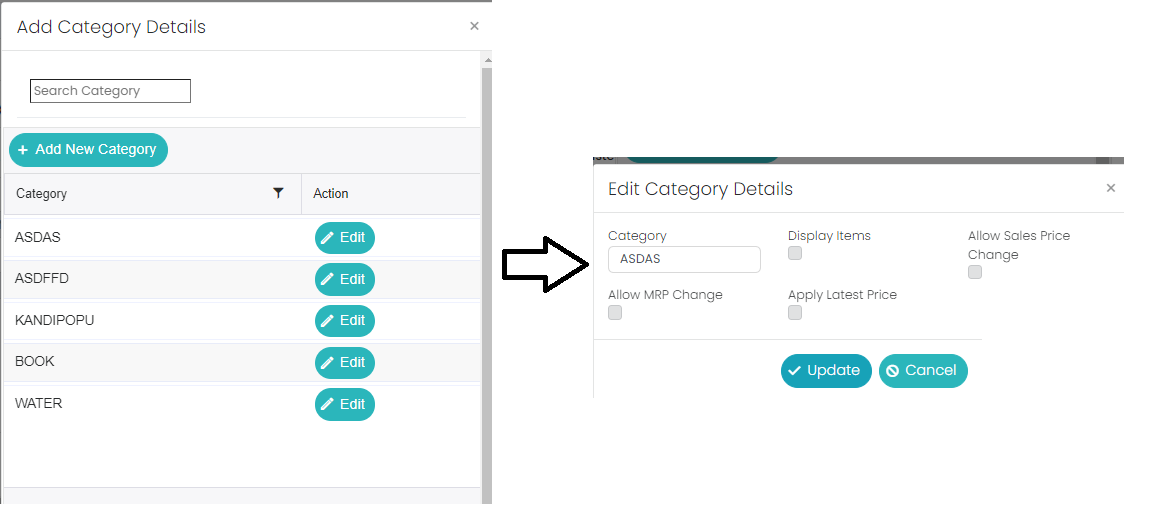
To edit the existing hierarchy details, click on the edit button then it will show the fields like
Display items: If user enable this then in the billing it will display the items in the pay page.
Allow Sale Price Change: If user enable this then only user can change the sale price for linking product to this category.
Allow MRP Change: If user enable only the MRP Change then MRP only will be change and the latest MRP will be Display in the billing, if user enable both the MRP and Sale price then based on the sale price MRP will be changed.
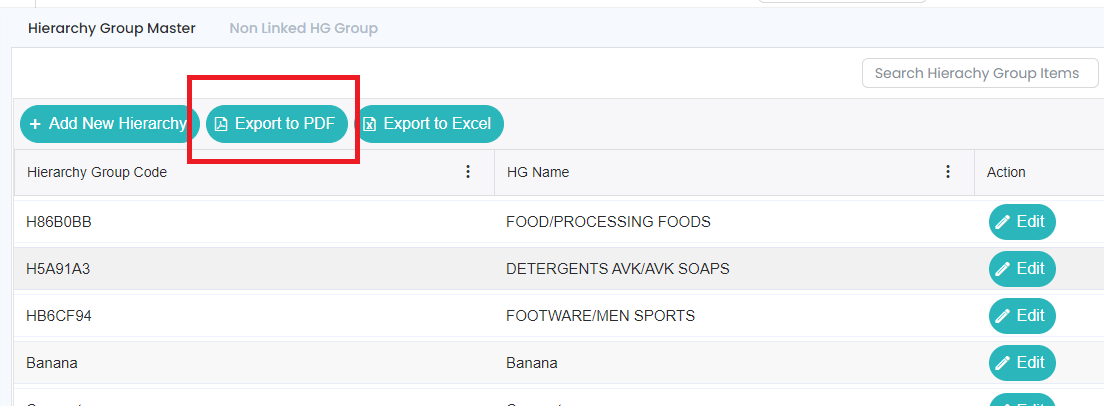
Below is the PDF format of Hierarchy details which we can get with the help of respective Export button.
Below is the Excel format of hierarchy details which we can get with the help of respective Export button.
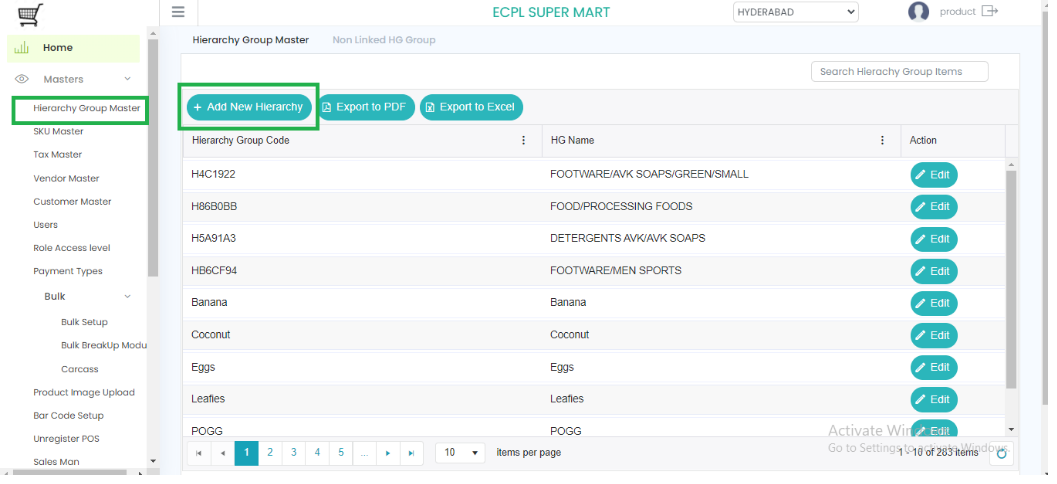
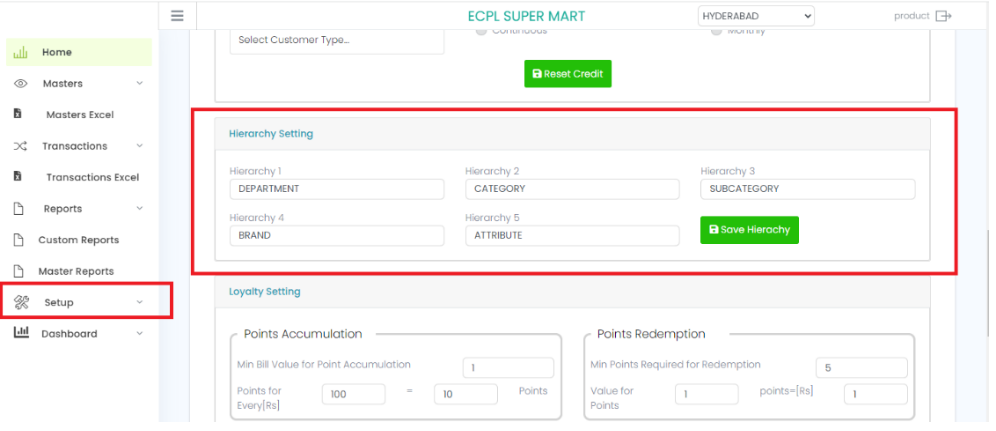
Click on Add New Hierarchy button to add new record of hierarchy, fill details and click on Save button. Here we will have 5 different types of Hierarchies, we can name them (path: prana Cloud POS -> Setup -> Configuration Settings -> Hierarchy Settings) according to our business convenience.